Rental Contracts
Manage the full rental contract lifecycle from checkout to closure
Overview
The Rental Contract module is the legally binding agreement between the rental company and the customer. It tracks the vehicle handover (checkout), the active rental period, the vehicle return (check-in), damage assessment, billing review, and final closure. Every contract links a verified customer, a verified driver, an assigned vehicle, and a pricing snapshot.
Contract List
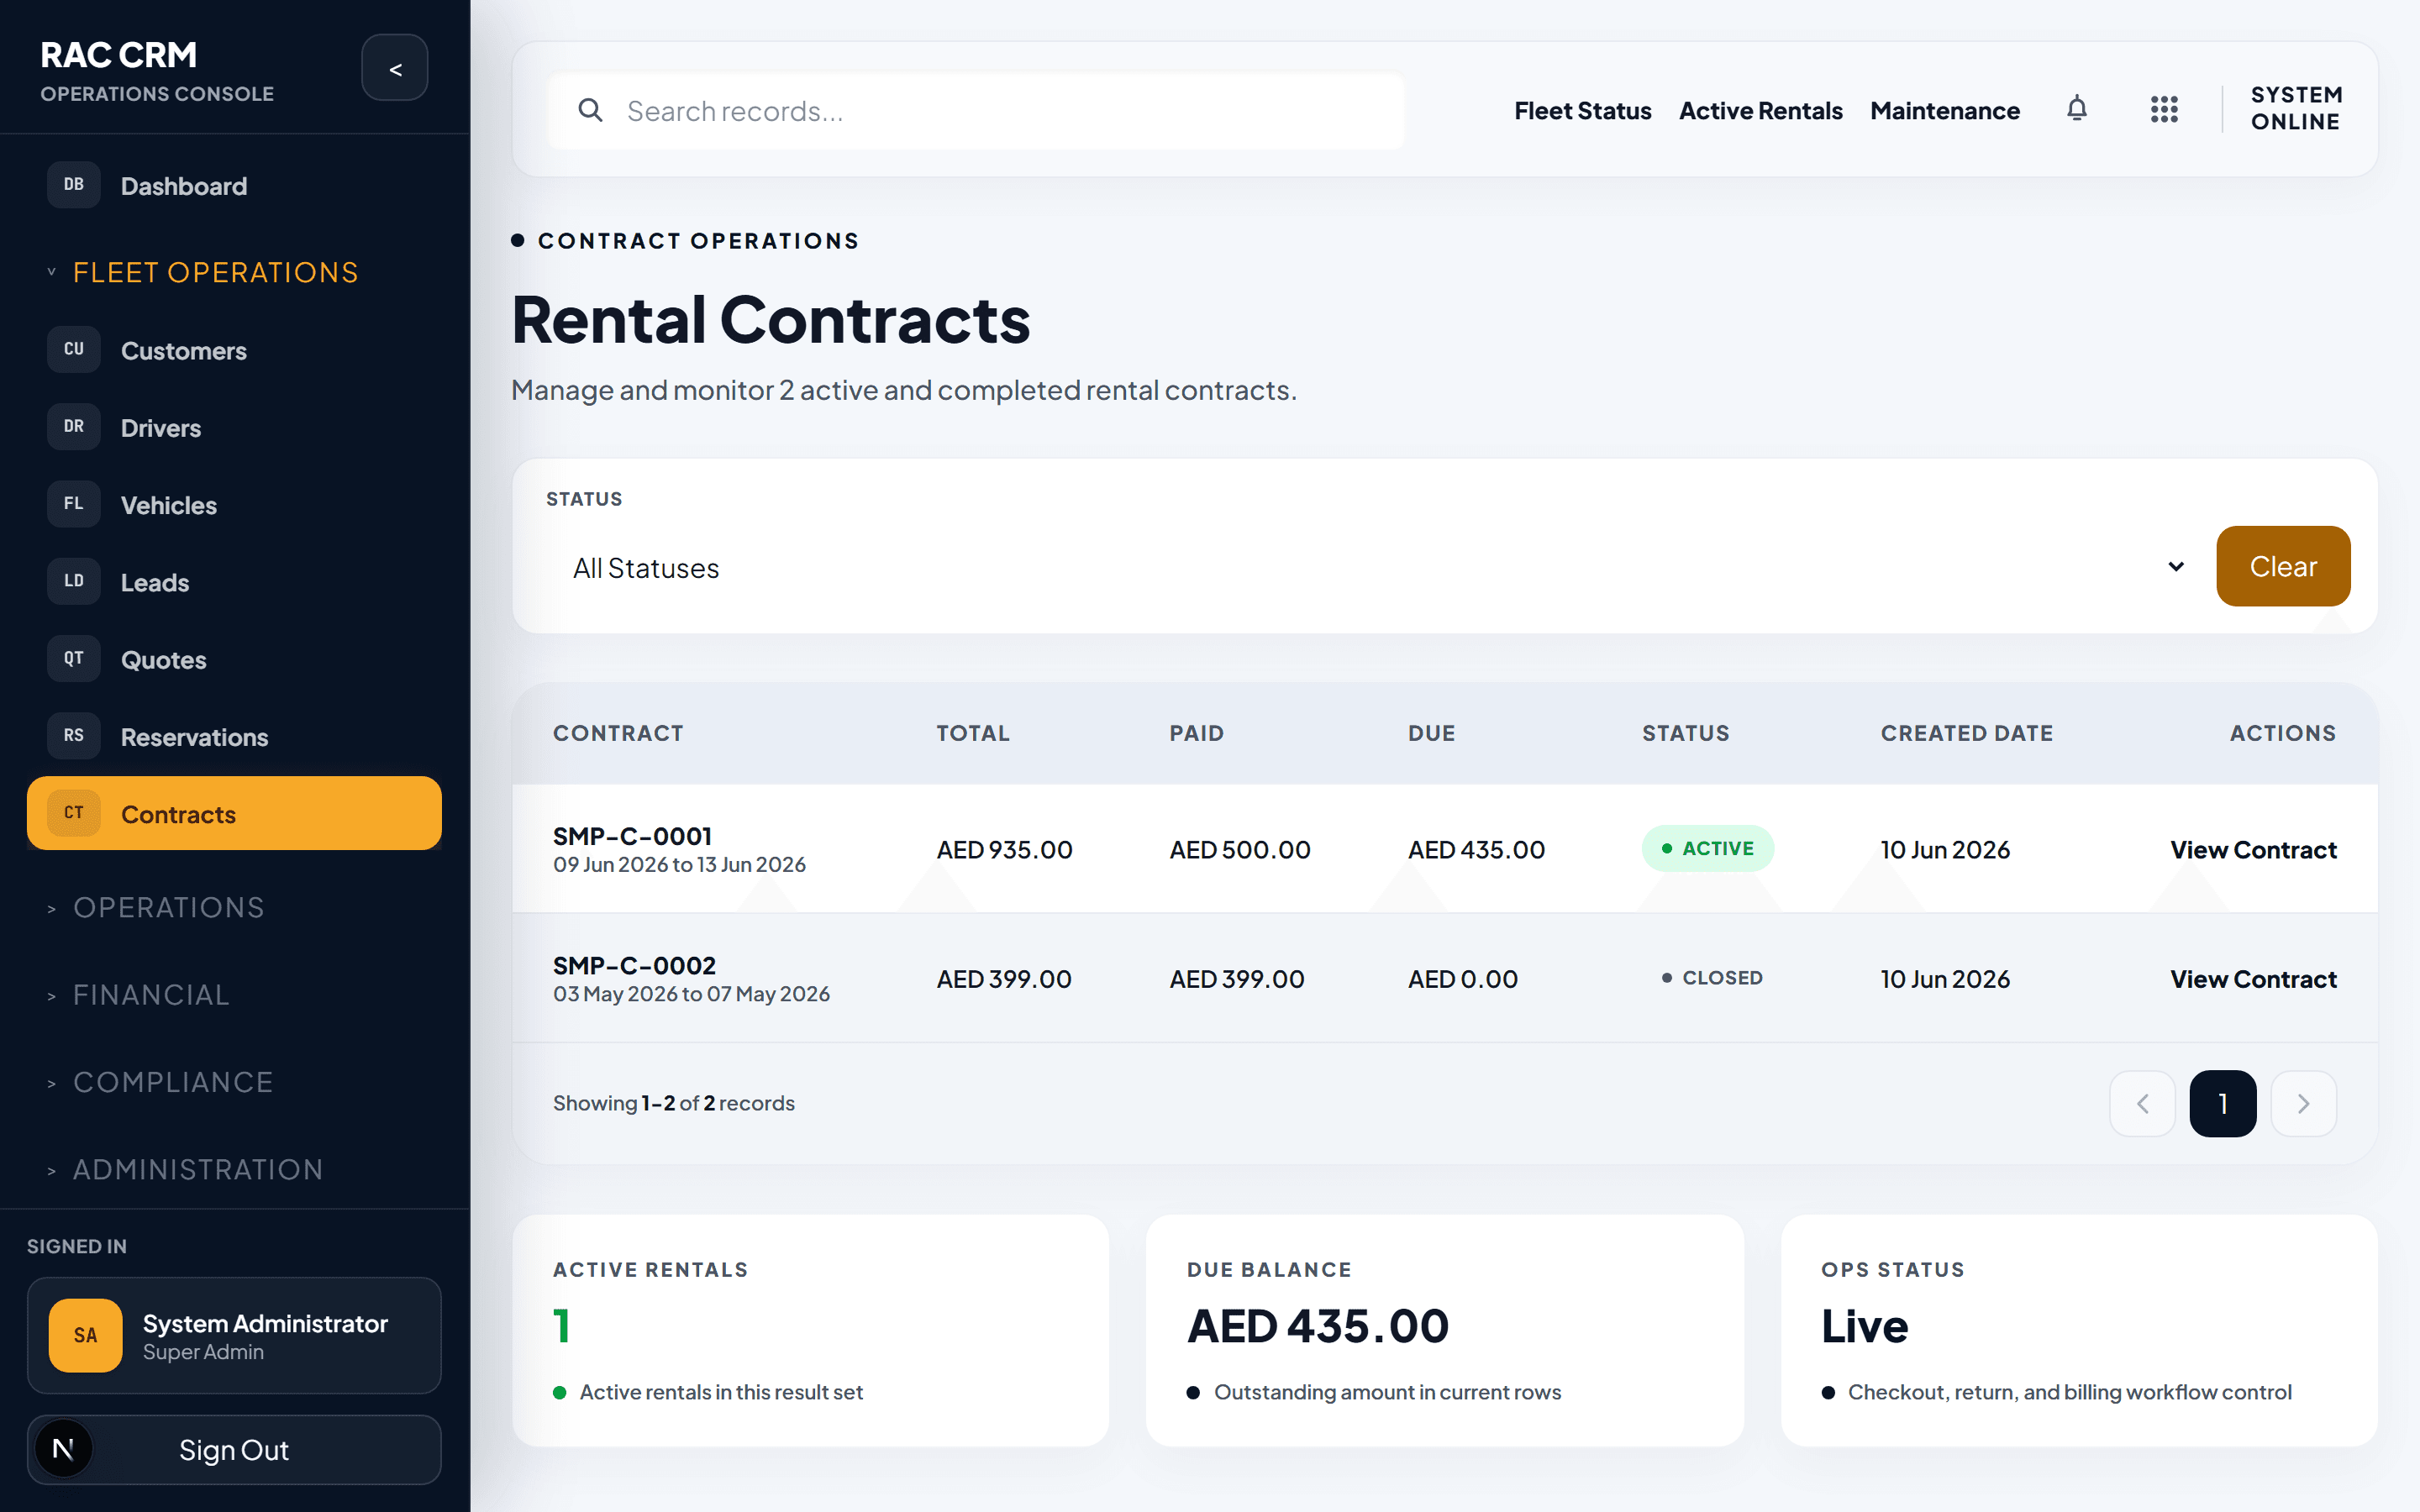
The contract list shows all rental agreements with filters for status, date range, branch, vehicle, and customer.
List Columns
| Column | Description |
|---|---|
| Contract Number | Unique rental agreement reference |
| Customer | Renter's name |
| Vehicle | Make, model, and plate number |
| Pickup Date | When the vehicle was or will be handed over |
| Return Date | When the vehicle is due or was returned |
| Status | Current contract status |
| Outstanding Balance | Unpaid amount on this contract |
Contract Statuses
Every contract follows a controlled lifecycle managed by the workflow engine.
| Status | Meaning |
|---|---|
| Draft | Contract created but checkout not started |
| Checkout Pending | Vehicle handover preparation in progress |
| Active | Customer has the vehicle, rental is in progress |
| Extension Requested | Customer has requested a rental extension |
| Return Pending | Vehicle return is due or in progress |
| Damage Review | Damage identified during return, under assessment |
| Billing Review | Final charges under review before closure |
| Closed | Contract fully settled and archived |
| Cancelled | Contract was stopped before activation |
Status Flow
graph LR
    A[Draft] --> B[Checkout Pending]
    B --> C[Active]
    C --> D[Extension Requested]
    D --> C
    C --> E[Return Pending]
    E --> F[Damage Review]
    F --> G[Billing Review]
    G --> H[Closed]
    E --> G
    A --> I[Cancelled]
    B --> I
Checkout Wizard
The checkout process is a guided 4-step wizard that activates the rental contract.
Step 1: Customer and Driver Verification
| Check | Action |
|---|---|
| Customer profile complete | Verify all mandatory fields are filled |
| Primary driver license verified | Confirm license is current and valid |
| Additional drivers verified | Each additional driver must have a verified license |
| Customer documents reviewed | ID front/back uploaded and checked |
| Blacklist check | Confirm customer is not blacklisted |
| Watchlist check | Flag if customer is on the watchlist |
If any check fails, the system blocks checkout and displays the issue.
Step 2: Vehicle Assignment and Inspection
| Action | Details |
|---|---|
| Vehicle selection | Assign the reserved vehicle or select an available one |
| Pre-rental inspection | Document vehicle condition with photos |
| Fuel level | Record fuel gauge reading (Full, 3/4, 1/2, 1/4, Empty) |
| Mileage | Record current odometer reading |
| Exterior condition | Note any existing scratches, dents, or damage |
| Interior condition | Note cleanliness and any interior damage |
| Accessories | Confirm GPS, child seat, or other accessories provided |
| Photo evidence | Upload timestamped photos of all four sides and interior |
Step 3: Financial Setup
| Item | Details |
|---|---|
| Rate confirmation | Daily, weekly, or monthly rate from pricing engine |
| Insurance package | Selected coverage level |
| Additional charges | Extra driver fees, accessories, delivery charges |
| Security deposit | Amount to be collected |
| Prepayment | Any advance payment required |
| Payment method | Cash, card, corporate account, or online |
| Invoice generation | System creates the initial invoice |
Step 4: Agreement Activation
| Action | Details |
|---|---|
| Review summary | All checkout details displayed for final review |
| Digital signature | Customer signs the rental agreement (or manual sign-off) |
| Activate contract | Contract status changes to Active |
| Vehicle status update | Vehicle moves from Reserved to Rented |
| Notification sent | Customer receives contract confirmation |
| Keys handed over | Physical key handover recorded |
Callout: A contract cannot become active without a verified customer, verified driver, assigned vehicle, completed inspection, and collected deposit. The system enforces all checks before activation.
Inspection Records
Inspection records document the vehicle condition at two critical points:
Checkout Inspection
Captured during Step 2 of the checkout wizard:
| Field | Description |
|---|---|
| Inspection Date | Date and time of inspection |
| Inspector | Staff member performing the inspection |
| Fuel Level | Fuel gauge reading |
| Mileage | Odometer reading |
| Exterior Notes | Description of exterior condition |
| Interior Notes | Description of interior condition |
| Photos | Timestamped images of the vehicle |
| Accessories Provided | List of accessories handed over |
Return Inspection
Captured during the check-in process:
| Field | Description |
|---|---|
| Inspection Date | Date and time of inspection |
| Inspector | Staff member performing the inspection |
| Fuel Level | Fuel gauge reading at return |
| Mileage | Odometer reading at return |
| Exterior Notes | Any new damage compared to checkout |
| Interior Notes | Any interior changes or damage |
| Photos | Timestamped images of the vehicle |
| Accessories Returned | List of accessories received back |
| Damage Found | Yes/No — triggers damage review if Yes |
Extensions
Customers may request to extend their rental period beyond the original return date.
Extension Request Steps
- Customer contacts the branch to request an extension.
- Open the active contract detail page.
- Click Request Extension.
- Enter the new proposed return date.
- The system:
- Checks vehicle availability for the extended period
- Recalculates pricing for additional days
- Verifies the customer's payment status
- Creates an extension request record
- The contract moves to Extension Requested status.
Extension Approval
| Condition | Action |
|---|---|
| Vehicle available for extended dates | Auto-approved or branch approval |
| Vehicle reserved for another booking | Cannot extend; suggest alternative vehicle |
| Outstanding balance on contract | Must be cleared before extension approval |
| Customer risk level high | Requires manager approval |
Extension Confirmation
- Manager reviews the extension request.
- Click Approve Extension or Reject Extension.
- If approved:
- Return date is updated on the contract
- Pricing snapshot is recalculated
- Customer is notified of the updated terms
- Contract status returns to Active
- If rejected:
- Customer is notified
- Original return date remains
- Contract status returns to Active
Check-In Process
When the customer returns the vehicle, the check-in process begins.
Check-In Steps
- Open the active contract detail page.
- Click Start Check-In.
- The contract moves to Return Pending.
- Perform the return inspection:
| Inspection Point | What to Check |
|---|---|
| Fuel Level | Compare to checkout level; note any difference |
| Mileage | Calculate total kilometers driven |
| Exterior Damage | Compare to checkout photos; note any new damage |
| Interior Damage | Check for stains, tears, or missing items |
| Accessories | Confirm all accessories are returned |
| cleanliness | Note if vehicle requires cleaning |
- Upload return photos.
- Click Complete Inspection.
Post-Inspection Routing
| Outcome | Next Status |
|---|---|
| No damage found | Proceed to Billing Review |
| Damage found | Move to Damage Review |
| Missing accessories | Move to Damage Review |
| Fuel not returned at agreed level | Additional charges added |
Callout: The return inspection is the most dispute-sensitive step. Always take comprehensive photos and record detailed notes. The checkout and return inspection comparison is the primary evidence for any damage claim.
Billing Review
Before contract closure, all financial items must be reviewed and settled.
Billing Review Checklist
| Item | Description |
|---|---|
| Base rental charges | Verify calculated amount matches agreed rate |
| Extension charges | Include additional days if extended |
| Fuel charges | Apply fuel difference charge if applicable |
| Mileage charges | Apply excess mileage charge if applicable |
| Damage charges | Include approved damage assessment costs |
| Traffic fines | Include any fines linked to this contract |
| Salik charges | Include any toll charges linked to this contract |
| Additional driver fees | Confirm all additional driver charges |
| Accessories charges | Confirm all accessory charges |
| Insurance excess | Apply insurance deductible if applicable |
| Deposit adjustment | Release, adjust, or forfeit security deposit |
| Discount or waiver | Apply any approved discounts or waivers |
| Tax | Confirm applicable tax is calculated |
| Total outstanding | Sum of all charges minus payments received |
Settlement
- Generate the final invoice from the billing review.
- Record any outstanding payments.
- Process deposit release or adjustment.
- Confirm all financial items are settled or approved.
- Click Approve Billing. The contract moves to Closed.
Contract Closure Requirements
A contract can only be closed when ALL of the following are true:
| Requirement | Status |
|---|---|
| Vehicle returned and inspected | Return inspection completed |
| Damage review resolved | Any damage charges approved or waived |
| Final invoice issued | Billing review completed |
| All payments recorded | No outstanding balance (or balance approved for write-off) |
| Deposit settled | Released, adjusted, or forfeited with approval |
| Traffic fines resolved | All fines linked and charged or waived |
| Salik charges resolved | All toll charges linked and charged |
| Workflow tasks complete | No open tasks or pending approvals |
| Accounting events generated | Financial events created for posting |
Business Tip: Run the "Open Contracts" report daily to identify contracts that are overdue for return, have pending billing, or have unresolved damage reviews. Prompt closure improves cash flow accuracy and fleet availability.